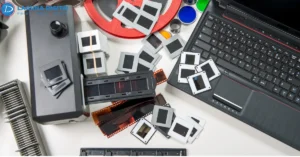




Old camcorder cassettes often sit untouched because the camera is gone, the cables no longer fit, or nobody wants to risk the only copy. Converting 8mm tapes to DVD solves the access problem, but the result still depends on what happens before the disc is made.
For most collections, create a digital master first, check it, back it up, then make the DVD. Direct recording is simpler, but it gives you fewer chances to catch playback problems.
8mm Tapes Need The Right Playback Equipment
Video8, Hi8, and Digital8 use similar-size cassettes, but they do not all play in every machine. Start with the cassette label and, if available, the model number on the original 8mm camcorder. Sony notes that many Digital8 models can play older Video8 and Hi8 recordings, but not every model can.
Playback quality sets the ceiling for the transfer. A clean cassette in a worn or incompatible machine can still produce unstable pictures, weak sound, or tracking errors.
It also prevents a common mix-up. An 8mm movie reel is film, not videotape. A film transfer service scans photographic frames, while an 8mm tape transfer service plays magnetic tape through compatible video equipment.
Identify The Cassette First
Look for Video8, Hi8, or Digital8 on the shell. If the label is missing, check the camcorder model before loading valuable media into unfamiliar equipment.
Inspect Old Tapes Before You Press Play
Before pressing play, inspect the cassette through its window. A cracked shell, visible mold, wrinkled tape, unusual slack, or moisture are reasons to stop and look closer.
The National Archives puts the point simply: “Limit the number of times an original tape is played.”
If playback sounds strained, the cassette hesitates, or the picture repeatedly drops out, stop testing. The VHS & beta tape transfer service page describes inspection and cleaning as part of the in-house process and also covers Hi8 and Digital8.
Four Transfer Methods And Where They Fit
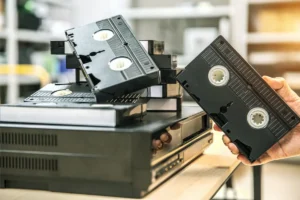
Once the cassette is identified and looks safe to play, the transfer method becomes easier to choose.
Direct Camcorder To DVD
The simplest video tape transfer sends the camcorder’s audio and video outputs straight to a DVD recorder. The cassette plays while the recorder writes the disc.
It works when the source is stable and a viewing copy is the only goal. The tradeoff is control. If the picture drops out or the sound drifts, there is no master file to inspect first.
Computer Capture
A capture device sits between the camcorder and computer, turning the playback signal into a file. With analog Video8 or Hi8, S-Video is generally preferable to composite when both devices support it.
This form of video tape conversion gives you a useful checkpoint. You can confirm the running time, check audio sync, and make a backup before authoring the disc.
For many households, this is the most useful tape to digital route because one capture can produce a master file, an MP4 copy, and a DVD.
Digital8 Through FireWire
Some Digital8 camcorders can output the recorded signal through IEEE 1394, commonly called FireWire, without first converting it to analog.
FireWire ports have largely disappeared from current computers, so adapters, older systems, or specialist equipment may be needed.
Useful 8mm tape conversion solutions should therefore begin with the recording format, not a promise about “HD conversion.” Upscaling can enlarge a frame, but it cannot recreate detail that was never recorded.
Professional Transfer
Professional video tape transfer makes sense when the camcorder is missing, the tape does not behave normally, or the footage cannot be replaced.
Ask how the source is played, what file type is delivered, whether DVD is optional, and what happens if the cassette has physical problems. Those answers tell you more than a low per-tape price.
If the same box contains Regular 8, Super 8, or 16mm reels, those need a separate workflow. The film transfer services page explains the frame-by-frame process used for photographic film.
Capture Quality Shapes The Final DVD
A DVD cannot improve a weak source capture. Most visible quality is decided during playback and recording.
For analog 8mm tapes, use the best stable output available. Keep 4:3 footage in its original shape unless it was genuinely recorded widescreen. Stretching an old home video to fill a 16:9 screen only distorts the image.
Good 8mm tape digitization also avoids over-processing. Sharpening can make edges harsher without restoring lost detail. The aim is a clean, stable copy that still looks like the source.
Audio needs the same care. During video tape digitization, listen for hum, dropouts, distortion, or sound that slips out of sync. A transfer is not complete simply because the picture looks acceptable.
A Digital Master Protects More Than A DVD
A DVD works well for viewing, but important 8mm tapes deserve another layer of protection.
With a digital master, the recording can be copied, shared as an MP4, or converted again later without replaying the cassette. That is the practical advantage of 8mm tapes to digital conversion.
Before making the disc, check the beginning, middle, and end of the file. Compare the running time with the source and confirm that audio stays synchronized. This review is one of the simplest forms of quality control in video tape digitization.
For families sorting several old formats at once, the guide to transferring old videos and films to digital explains why videotapes, camcorder cassettes, and film reels need different transfer paths.
The Real Cost Includes Time, Gear, And Risk
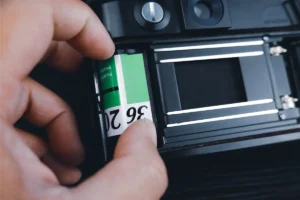
DIY can be inexpensive if you already own a working camcorder, the correct cables, capture hardware, storage, and a DVD burner. Buying legacy equipment for one project can change the calculation quickly.
Tape capture also runs in real time. A two-hour cassette needs about two hours for playback before review, backup, and DVD authoring.
When comparing 8mm tape conversion solutions, ask what the quote includes. File format, damaged-media handling, return of originals, master-file delivery, and DVD creation can matter as much as price.
Film scanning should be priced separately because it uses different equipment and handling.
Match The Transfer Method To The Collection
The best choice depends on what you have and what you want to keep.
| Situation | Practical Starting Point | Main Advantage |
| Working camcorder and simple DVD need | Direct DVD recording | Fewest steps |
| Want a master plus DVD | Computer capture | Easier review and backup |
| Compatible Digital8 equipment | Digital connection | Avoids an extra analog step |
| Unstable or irreplaceable cassette | Professional transfer | Less trial-and-error playback |
| Mixed film and video collection | Separate workflows | Correct equipment for each medium |
For a small collection in good condition, DIY may be reasonable. For 8mm tapes with unknown history, playback problems, or high personal value, equipment condition matters more than saving one conversion fee.
A professional 8mm tape transfer service should explain its output options, return the original media, and provide files you can back up.
Frequently Asked Questions
Can 8mm Tapes Be Transferred Directly To DVD?
Yes. A compatible camcorder can feed a DVD recorder directly. Creating a digital master first is more flexible because you can review the footage, keep a backup, and make another disc without replaying the cassette.
What Is The Best Format For 8mm Tape Digitization?
Keep a good-quality master file for preservation and use MP4 for convenient viewing and sharing. DVD can remain an additional viewing format rather than the only copy.
Is Professional Video Tape Conversion Better Than DIY?
It depends on the collection. DIY can work well with known-good equipment and stable tapes. Professional transfer is more sensible when playback hardware is unavailable, the cassette behaves abnormally, or the recording cannot be replaced.
How Long Does Conversion Take?
Capture normally runs in real time. A 60-minute recording needs about an hour of playback, plus time to review the file, create backups, and author the DVD.
Should Original Tapes Be Kept After Conversion?
Yes, when practical. After a successful tape to digital transfer, keep the original cassette upright in a clean, cool, dry place and avoid unnecessary playback.
Final Verdict
The strongest workflow for most 8mm tapes is simple: identify the format, check the cassette, use compatible playback equipment, capture a verified master, back it up, and create the DVD from that file.
If the original 8mm camcorder no longer works, the tape shows signs of trouble, or the footage is too important to risk on repeated testing, professional help is the safer route. For 8mm tapes to digital conversion with digital-file and disc options, Laguna Digital can help turn old recordings into copies that are easier to watch, share, and preserve.