
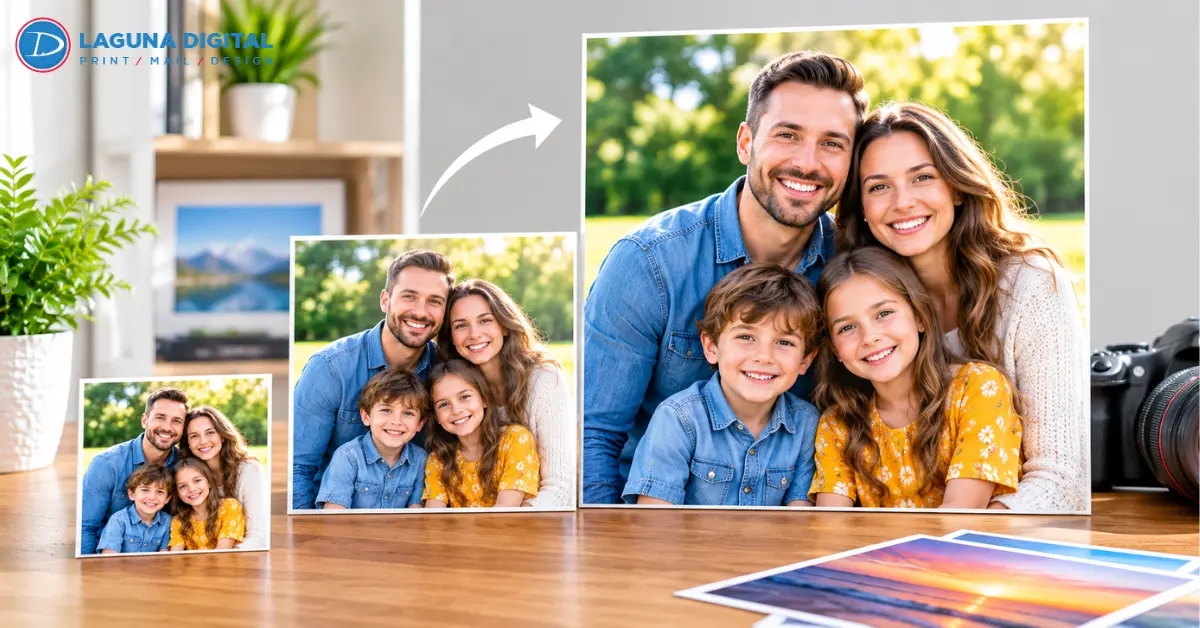
Photo enlargements preserve quality when their source has enough usable detail, the crop is set before resizing, color is optimized for print production and final size fits viewing distance. The optimal workflow begins by reviewing the original file and checking effective pixels per inch before once-enlarging the image once before creating a full-size test section before production.
Check the Original Before Choosing a Print Size
Use the Best Available Source
Starting a photo enlargement project often means starting from its original camera file. RAW, TIFF, HEIC and maximum-quality JPEGs tend to retain more details than screenshots or social media downloads do, since messaging apps tend to compress photographs further while diminishing fine details.
For large photo prints, compare every available version before editing. Check pixel dimensions, not only file size. A large file can still be blurry, while a smaller, well-focused image may print well at a practical size.
Old photographs need a different approach. A clean scan usually provides better information for photo restoration than a phone picture. The digital art and photo scanning service explains options for converting physical photographs into workable digital files.
Calculate Effective Resolution
Pixels per inch, or PPI, describes how many image pixels are available across each printed inch. Printer DPI describes how ink or toner is placed, so the terms are not identical.
Final PPI = pixel width divided by print width in inches
A 6000-pixel-wide file produces 300 PPI at 20 inches, 200 PPI at 30 inches, and 150 PPI at 40 inches. Closely viewed portraits and high resolution prints need more information than displays viewed from across a room.
Prepare the File in the Correct Order
Correct Problems Before Resizing
Exposure, white balance, lens distortions, dust accumulation and color casts should be corrected at their original resolutions. Noise reduction must take place prior to file enlargement while output sharpening must occur after reaching final dimensions of file.
Use this sequence:
- Keep an untouched master copy.
- Correct exposure and color.
- Remove dust, scratches, and compression artifacts.
- Crop to the final aspect ratio.
- Resize once to the required dimensions.
- Inspect important details at 100 percent.
- Apply restrained output sharpening.
- Export a separate production file.
This order protects image quality by keeping each adjustment tied to the strongest available information. The photo printing service is useful when a file must be checked against the intended size, paper, and finish.
Handle Scanned Photographs Carefully
A small print may need a higher optical scan resolution when reproduced several times larger. Interpolation can add pixels, but it cannot capture new physical detail.
Repair fading, stains, tears, and color imbalance before final resizing. Good digital photo printing depends on a clean master scan, especially when faces, handwriting, or clothing texture must remain visible.
Oversized or delicate originals may need specialized capture. The guide to how large-format fine art scanning works explains how controlled lighting, resolution, and color management affect the final file.
Enlarge Without Creating an Artificial Look
Resize Conservatively
Resampling estimates new pixels from nearby information. It can support moderate enlargement, but it cannot restore missed focus or texture that is absent from the original. Excessive processing may create waxy skin, repeated patterns, brittle edges, or unnatural hair.
For professional photo printing, inspect eyes, fabric, tree branches, text, and architectural lines at actual pixel view. These areas expose processing problems sooner than skies or smooth backgrounds.
A clean 12-megapixel image may support attractive custom photo prints, but acceptable dimensions depend on crop, subject, surface, and viewing distance.
Print a Full-Size Test Crop
A reduced screen preview is not a substitute for a physical proof. Select a demanding section and print it at the final scale. For a portrait, include an eye and hair. For a landscape, include foliage or distant structures.
A test crop reveals noise, softness, dark shadows, color shifts, and oversharpening before the full order is produced. It is particularly useful for large format printing, where defects become more visible on a wall.
Choose a Surface That Supports the Image
Compare Paper and Canvas
Glossy and luster papers emphasize crisp edges and contrast. Matte paper reduces glare, while textured cotton paper adds character but can soften very fine detail.
Canvas prints create a warmer display and can be forgiving with moderately soft images because the weave breaks up tiny imperfections. They are less suitable for small lettering or precise linework. The canvas and acrylic print comparison offers more guidance on texture, glare, sharpness, and lighting.
For wall art prints, consider room light, viewing distance, and reflections. A surface should preserve image quality, not hide a weak file.
Protect Tonal and Color Detail
A bright monitor can make shadows look more open and colors more intense than they will appear on paper. Review the file on a calibrated display and use the color profile requested by the printer.
The article on why print colors differ from screens explains how RGB light, CMYK output, paper, and viewing conditions affect results. For fine art printing, a physical proof is valuable when neutrals, skin tones, deep blues, or shadow detail must remain controlled.
Protect the Crop and Final Presentation
Set the Crop Before Enlargement
Camera aspect ratios don’t always align with conventional print dimensions. A 4-by-6 image may feature different proportions than an 8-by-10 print, potentially cropping away hands, heads, signatures or important background details that would otherwise remain.
Prepare each size independently. Photo prints intended for frames need room for trimming and matting. Canvas prints need extra image area when the photograph will wrap around stretcher bars.
Before approving custom photo prints, check all four edges at final size. A sharp file can still fail if the crop weakens the composition.
Review the Production File
Confirm these points before production:
- Correct dimensions and aspect ratio
- Sufficient effective PPI
- Visible detail in highlights and shadows
- Clean edges without sharpening halos
- Correct color profile
- Adequate trim or wrap allowance
- An archived master file
- Approval of a full-size proof section
These checks improve consistency across photo printing, mounted displays, and wall art prints. For premium fine art printing, also review paper white, texture, black density, and tonal transitions. The art reproduction services page explains how capture, color management, proofing, and print material work together.
Know When Professional Production Helps
Larger work needs closer control because every weakness becomes more visible. Large photo prints benefit from file review, careful scaling, color-managed output, and a surface selected for the display environment.
When photo restoration is required, scratches, fading, stains, and missing areas should be repaired without flattening skin texture or removing meaningful details.
For important high resolution prints, request a proof rather than relying only on an online preview. A proof can confirm crop, density, color balance, and perceived sharpness under real lighting.
The same care supports large format printing for exhibitions, offices, retail interiors, and personal displays. In digital photo printing, consistent output depends on the file, output device, ink system, material, and viewing conditions.
How Large Can a Photo Be Enlarged Without Becoming Blurry?
Divide the file’s pixel dimensions by the intended print dimensions to calculate effective PPI. Then inspect focus and noise at 100 percent. A lower PPI may work for a piece viewed from several feet away, but a full-size proof is the safest test.
Is 300 PPI Required for Every Photo Enlargement?
No. Three hundred PPI is a strong target for close viewing, but larger displays can remain sharp at lower values when the source is clean and the viewing distance is greater.
Can a Phone Photo Produce a Large Wall Print?
Yes, provided the original full-resolution file is sharp and not heavily compressed. Screenshots, social media downloads, digital zoom, and low-light blur reduce the practical enlargement size.
What File Format Is Best for Enlarged Photos?
A maximum-quality JPEG suits many projects. An uncompressed TIFF or a TIFF using lossless compression is useful when extensive editing or preservation is required. Keep the original RAW file as the master when available.
Should an Old Photograph Be Restored Before It Is Enlarged?
Yes. Scan the original first, complete repairs at the highest useful resolution, then resize and sharpen for the chosen output. Enlarging first can make scratches, fading, and paper texture harder to correct cleanly.
Conclusion
Selecting an ideal source image, calculating realistic dimensions, correcting defects before resizing, protecting crop edges during enlargement process and aligning surface texture to image; this approach ensures more reliable prints while decreasing risk of large results appearing soft, dark or poorly cropped.
Laguna Digital provides carefully reviewed files, archival scanning services, professional photo printing and gallery-ready enlargements that meet museum quality requirements. Send original image dimensions along with desired dimensions directly to us for evaluation before production commences.