
A plain poly bag can protect a product, but protection is only the first step. Once the item reaches a shelf, counter, boutique rack, stockroom, or event table, the bag has to do more. It needs to help the buyer understand the product, help the retailer organize it, and help the checkout process move smoothly.
That is why a simple bag can still become a polished retail pack. The difference usually comes from the fit, fold, label, barcode, header card, and final presentation. When those details work together, the product looks intentional instead of unfinished.
Packaging Basics That Make a Poly Bag Retail Ready
Retail ready packaging starts with one practical question. How will the customer or store staff handle the finished item?
A product that hangs on a peg needs a strong top area. A product placed flat on a shelf needs a clean front face. A product stored in bins needs clear labeling that can be read quickly. The bag should match the way the item is sold, not only the way it is packed.
Good product packaging also reduces confusion. A buyer should be able to see what the item is, what size or style it is, and why it belongs in the cart without opening the bag.
Start With the Filled Product
Do not choose the bag from the flat product measurement alone. Measure the item after it is folded, bundled, or stacked the same way it will be sold.
This matters most in apparel packaging. A small shirt, thick sweatshirt, towel set, or accessory bundle can change shape once folded. If the bag is too loose, the product shifts and wrinkles the film. If it is too tight, the seal pulls, and the finished piece looks stressed.
Garment packaging should feel neat in the hand. The fold should stay straight, the main product area should face forward, and the closure should not press against the item.
Keep the Front Easy to Read
The front should not try to say everything. It should identify the product quickly and support the sale.
A clean front usually includes the brand, product name, and one important buying detail such as size, color, count, style, scent, or material. Details like care notes, longer descriptions, reorder information, or QR codes can move to the back when space allows.
Use Header Cards to Create a Store Display Face
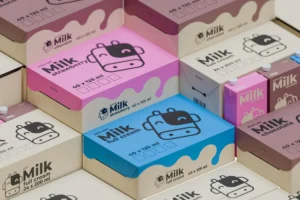
A header card is one of the most practical ways to turn a clear bag into a retail display piece. It gives the product a printed top section, creates space for branding, and allows the item to hang neatly.
For products sold on pegs or display hooks, custom header cards can hold the brand name, product title, SKU details, and hang-hole style without covering the full product.
This approach works especially well when the product itself should remain visible. The bag protects the item, while the card gives the retail pack a finished face.
Build the Card Around the Bag Width
The card should be designed after the bag size is confirmed. A card that is too narrow looks weak. A card that is too wide bends at the corners or catches during handling.
Before printing a full run, fold one sample over the filled bag. Check the score line, staple position, hang hole, and front artwork. If the product pulls down too much, the top area may need stronger stock or a different hang-hole style.
Keep the Design Consistent Across SKUs
Branded packaging works best when related products look like they belong together. Use the same card shape, logo position, product-name area, and barcode zone across the line.
Then adjust only the details that need to change, such as color, size, count, scent, or style number. This keeps the product family organized and makes reorders easier.
Use Labels When the Product Line Has Many Variants
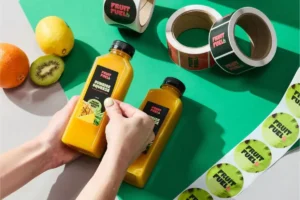
Labels help when one bag or card needs to support several versions. Instead of printing a separate component for every SKU, the base design can stay the same while labels handle the changing details.
For clear products or light-colored items, clear stickers can add a clean brand mark without blocking the view. For darker products, small text usually gives stronger contrast and better readability.
This is useful for on demand packaging because small batches, seasonal items, and test products can be prepared without rebuilding the full design each time.
Place Variant Details in One Fixed Area
Size, color, quantity, and barcode labels should not move from one unit to the next. Pick one label zone and keep it consistent.
That small rule makes packaging bags easier to scan, stock, and compare. It also prevents the finished product from looking rushed.
Make Barcode Placement Part of the Design
A barcode should never feel like an afterthought. It needs a flat, readable space that will not bend, wrinkle, glare, or sit too close to a fold.
GS1 US explains that UPC barcodes have a fixed height-to-width relationship and need clear quiet zones on both sides. Reducing height or crowding the sides can hurt scan performance.
For poly bag packaging, a label or header card is often a better barcode surface than loose plastic. Film can reflect light, curve around the product, or wrinkle during packing. A flat printed area gives the scanner a better chance to read correctly.
Test the Barcode on a Finished Sample
Print one sample, pack the real product, and scan it with a retail scanner or reliable barcode app. Test more than once and from different angles.
This simple check can catch layout problems before production. It is easier to move a barcode during proofing than to fix hundreds of finished units.
Add Required Product Information Without Cluttering the Front
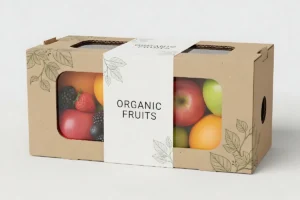
Retail packaging should look clean, but it still needs the right information. The exact details depend on the product category, sales channel, and retailer requirements.
For many U.S. textile and wool products, FTC guidance says labels must include fiber content, country of origin, and the identity of the manufacturer or another responsible business.
The FTC Care Labeling Rule also states that if a packaged, displayed, or folded textile product prevents customers from seeing or easily finding the care label, the care information must appear outside the package or on a hang tag.
Keep Compliance Details Accessible
For apparel packaging, do not hide care details behind folds, cards, or stickers. If the sewn label cannot be seen or easily found, add the necessary care information to the outside pack or attach a hang tag.
The same thinking applies to garment packaging for shirts, towels, hosiery, and textile accessories. Product packaging services should review the filled sample, not only the flat artwork file.
Prepare the Product Before It Goes Into the Bag
A clean printed piece cannot fix a careless pack-out. The product should be folded, cleaned, counted, and faced correctly before it goes into the bag.
Use a folding board for clothing. Remove lint from dark items. Keep tags from covering the main design. For sets, confirm the count before sealing. If the item has a printed design, face it toward the front.
These small production habits make retail packaging feel more professional. They also reduce returns, questions, and repacking work.
Create a Pack-Out Standard
Write down the finished process once the sample is approved. Include the bag size, fold method, label position, barcode location, header card size, closure method, and inspection steps.
For repeated label application, roll stickers can help keep placement faster and more consistent than loose single pieces.
A written standard is especially useful when more than one person handles packing. It keeps custom packaging consistent across shifts, vendors, and reorders.
Choose Print Pieces That Fit the Product Stage
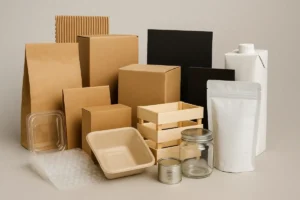
The best packaging company for a growing product line is not always the one offering the most expensive finish. The better choice is the team that understands the quantity, product shape, display method, finish, adhesive, proofing process, and deadline.
For an early test run, business packaging may only need a fitted bag and a clean label. For a boutique or retail program, the product may need a header card, variant label, barcode area, and coordinated insert.
On demand packaging works well when the product line is still changing. Once the format proves itself, custom packaging can move into larger and more repeatable runs.
Match the Finish to the Retail Setting
A glossy label can look bright, but it may create glare on dark products or curved film. A matte label can make small text easier to read. A thick card can support hanging weight, while a lighter card may work for flat-packed items.
These choices should come from the actual product, not from a generic design preference. Retail packaging solutions are strongest when they solve handling, display, and buying problems at the same time.
Final Sample Review Before Production
Before approving a full run, build one complete sample with the real item inside. View it like a retailer would. Hang it, stack it, scan it, and place it near similar products.
Check whether the product name is clear from a short distance. Confirm that the size or variant is easy to find. Make sure the barcode scans. Look for wrinkles, crooked seals, hidden care details, weak hang holes, and labels placed too close to the edge.
This review is where a basic idea becomes a dependable retail pack. It also gives product packaging services a clear production reference to follow.
FAQs
How Do You Make a Plain Poly Bag Look Retail Ready?
Use a fitted bag, clean product fold, readable label, scannable barcode, and a header card or sticker that clearly identifies the item. The final pack should look consistent from one unit to the next.
What Is the Best Way to Brand a Poly Bag?
A header card is best for hanging products. A sticker or label is better for flat shelf display, small batches, and products with many size or color variants.
Can Clear Bags Work for Retail Packaging?
Yes. Clear bags can work well when the product is folded neatly, the bag fits properly, and the label or card carries the information needed for display, checkout, and customer review.
Where Should the Barcode Go on a Poly Bag?
Place the barcode on a flat label or printed card. Avoid seams, folds, staples, glare, wrinkles, and curved areas because those details can make scanning harder.
What Should Be Included on Product Packaging?
Most retail items need a product name, brand, size or variant, quantity, barcode, and any required care, safety, or compliance details. Apparel and textile products may also need fiber, origin, manufacturer, and care information depending on the item.
Conclusion
A plain bag becomes effective packaging when every part has a purpose. The bag protects the product. The fold controls the view. The card or label explains the item. The barcode supports checkout. The final sample proves the pack can survive real handling.
Do not approve the job from a flat design file only. Build one finished sample, scan it, hold it, hang it, and check whether a customer can understand it quickly.
For header cards, stickers, labels, and printed pieces that help turn basic bags into retail-ready product presentation, work with Laguna Digital and prepare the bag size, filled product dimensions, quantity, artwork, and display method before requesting production.