

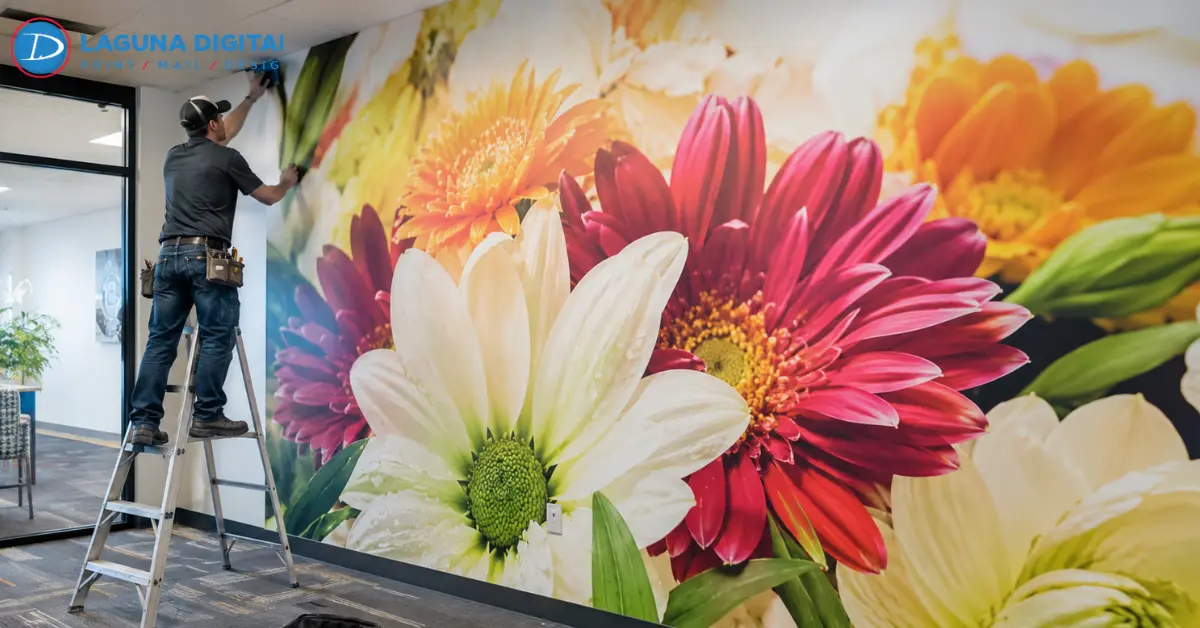
A mural can look flawless on a laptop and turn noticeably soft after it is enlarged across an eight-foot wall. Screens hide problems that become easy to see in print. For wall murals, the useful question is not whether a file is labeled high resolution. What matters is how much real picture information remains when that file reaches its finished size.
For many indoor installations, 150 PPI at final size is a sensible starting point. Close viewing may call for 200 to 300 PPI, while a lobby graphic seen from farther away can often use less.
That difference is central to mural printing. Image resolution has to be considered alongside viewing distance, the original file, the amount of cropping, and the printer’s specifications.
Start With the Pixels You Actually Have
PPI measures pixels per inch at a chosen output size. DPI describes printer output. For the file itself, pixel dimensions and effective PPI are the more useful checks.
Suppose a photograph is 6,000 pixels wide. At 20 inches, it provides 300 PPI. At 40 inches, the same file provides 150 PPI. Enlarge it to 60 inches and it drops to 100 PPI. The source did not change. The output size did.
High resolution images should not be judged by megabytes alone. Compression can change file weight without creating detail. Digital printing starts with usable source information, not simply a large upload.
Viewing Distance Changes What Looks Sharp
A corridor photograph may be inspected from two feet away. A reception graphic may normally be seen from twelve feet.
For wall murals, these ranges are useful during planning.
| Typical viewing situation | Starting range |
| Fine photographic detail seen very close | 200 to 300 PPI |
| Indoor artwork viewed from a few feet | 150 to 200 PPI |
| Large graphics viewed across a room | 100 to 150 PPI |
A lower number is not automatically poor quality. The detail has to survive at the distance where people will actually see the piece. That is why large format printing is prepared differently from small photo printing.
The guide to maximum sizes for large format poster printing adds useful context on scale and viewing distance before oversized artwork goes to production.
Do the Pixel Math Before Building the Layout

One calculation can expose a weak source before design approval.
Required pixels = final dimension in inches × target PPI
An 8 foot by 6 foot installation measures 96 by 72 inches.
- At 100 PPI the file needs 9,600 by 7,200 pixels
- At 150 PPI it needs 14,400 by 10,800 pixels
- At 300 PPI it needs 28,800 by 21,600 pixels
For wall murals, calculate after the intended crop is known. A landscape image may seem large enough until much of the frame is removed to fit a narrow wall.
The same issue appears with custom murals designed around windows, doors, display cases, or fixed furniture. Judge print resolution from the final composition rather than the untouched original.
A Big File Can Still Be a Weak File
Pixel count cannot reveal missed focus, motion blur, repeated JPEG compression, or sharpening halos. Inspect the best source at 100 percent. Faces, foliage, fabric, stone, and small lettering expose problems quickly. For phone photography, use the original camera file rather than a screenshot or social copy.
This check matters for wall murals because resizing cannot recreate missing detail. With large format prints and photographic wall art, minor softness on screen can become obvious at display size. Good print quality begins before output.
Keep Logos and Type Out of the Pixel Problem
Photographs are raster images. Logos, icons, line art, and typography are often better kept as vector elements because they can scale without the same pixel-based edge loss.
In wall graphics that combine photography with branding, flattening too early can leave acceptable photos beside fuzzy lettering. Keep vector elements intact as long as the workflow allows.
Scale matters too. A layout built at 50 percent of final size needs twice the required PPI. At 10 percent scale, it needs ten times the final effective PPI.
If the source begins as a painting, drawing, map, or another physical original, large-format fine art scanning can create a detailed print-ready master before enlargement.
Preserve a Strong Master File
Keep the best source separate from the delivery file so export choices do not reduce the original.
For wall murals built from photographs, TIFF can serve as a detailed raster master. PDF can preserve vector text and graphics. JPEG may also work when compression is controlled and the printer accepts it.
Changing formats does not create missing information. A weak JPEG saved as TIFF is still based on the same weakened source. The guide to file formats for high resolution scanning explains why master-file choices matter when artwork begins as a scan.
This protects image resolution through digital printing. Keep high resolution images in the master and create a separate production copy with the required output settings.
Review the Wall as Part of the File
A technically sound image can still fail when the wall is treated as an afterthought.
Before mural printing begins, compare the artwork with confirmed measurements. Check panel width, overlap, bleed, corners, outlets, doors, and seams. Move faces, logos, and small text away from panel breaks where possible.
For wall murals, choose one demanding part of the artwork and inspect it at full output size. A section containing skin tone, texture, a hard edge, and small type can reveal several problems at once.
Professional photo printing services can help when a source needs evaluation for enlargement, color, or physical output. Here, print quality depends on both the file and the finished viewing conditions.
Catch the Expensive Mistakes While They Are Still Digital
Many failures begin with ordinary decisions. A web image is enlarged because it looks fine on screen. A PPI field is changed as though that creates detail. A tight crop passes unnoticed. Small types are rasterized too early.
The opposite mistake is forcing 300 PPI onto every job. That can make files cumbersome for large format printing without improving what a viewer sees from a normal distance. Going too low creates a different problem when people can walk directly up to the image.
For custom murals, consider the whole job rather than one number. Wall murals can magnify small file mistakes. Source quality, dimensions, crop, surface, viewing distance, and panel layout work together. The same discipline produces cleaner large format prints, sharper wall art, and more dependable wall graphics.
Run a Short Preflight Before Approval
Before approval, check what can still be corrected.
- Confirm the measured wall size
- Calculate effective PPI after the final crop
- Inspect the original source at 100 percent
- Keep important logos and text as vector elements where possible
- Verify bleed, trim, overlap, and panel seams
- Review the required color setup and export format
- Check one detailed area at full output size
- Save the production file separately from the master
A short review can catch an expensive problem before installation.
Frequently Asked Questions
What resolution is best for a wall mural?
For many indoor wall murals, 150 PPI at final size is a practical starting point. Close viewing may call for 200 to 300 PPI, while a larger graphic seen from farther away may work around 100 to 150 PPI. Follow the printer’s file requirements when they call for something different.
Is 150 DPI enough for a large wall mural?
When 150 DPI describes an image file, the intended meaning is often 150 PPI at final size. That can work for many indoor installations viewed from several feet away when the source is sharp and not heavily cropped.
How can I tell whether my photo is large enough?
Divide pixel width by planned print width in inches. Repeat for height and use the lower result as effective PPI. Then inspect focus and compression because the calculation cannot confirm visual sharpness.
Can a phone photo be printed as a mural?
Yes, if the original contains enough usable detail. Use the full-size camera file, avoid screenshots and social copies, account for the final crop, and test a full-size section when close viewing is expected.
Which file type works best for mural artwork?
Use the format requested by the printer and confirm its print resolution requirements. PDF suits layouts with vector text and logos. TIFF works well for detailed raster masters. A high-quality JPEG can also work when compression is controlled.
To Sum Up
Sharp wall murals come from matching the source to the real installation. Measure the wall, calculate effective PPI at final size, inspect the crop, preserve vector elements, and review a full-size detail before approving the complete run.
If the file is borderline, do not judge it from a monitor alone. Send the original artwork and finished dimensions to Laguna Digital for a file review before committing to production.